Create a Cluster
Adding compute infrastructure in Vantage is a breeze. Choose your desired cloud provider and start running workloads.
This tutorial will teach you how to create a slurm cluster on your local machine using the Vantage CLI.
More information on Deployment Applications.
In this tutorial we create the cluster in the Vantage web ui, but clusters can a be created via the vantage-cli, vantage-sdk, and vantage-api.
Please see the documentation for cluster creation in the respective sections:
Prerequisites
- 1 x Ubuntu 24.04 desktop or server
- Access to the terminal of the machine with multipass
- astral-uv - we will use this to install vantage-cli from pypi
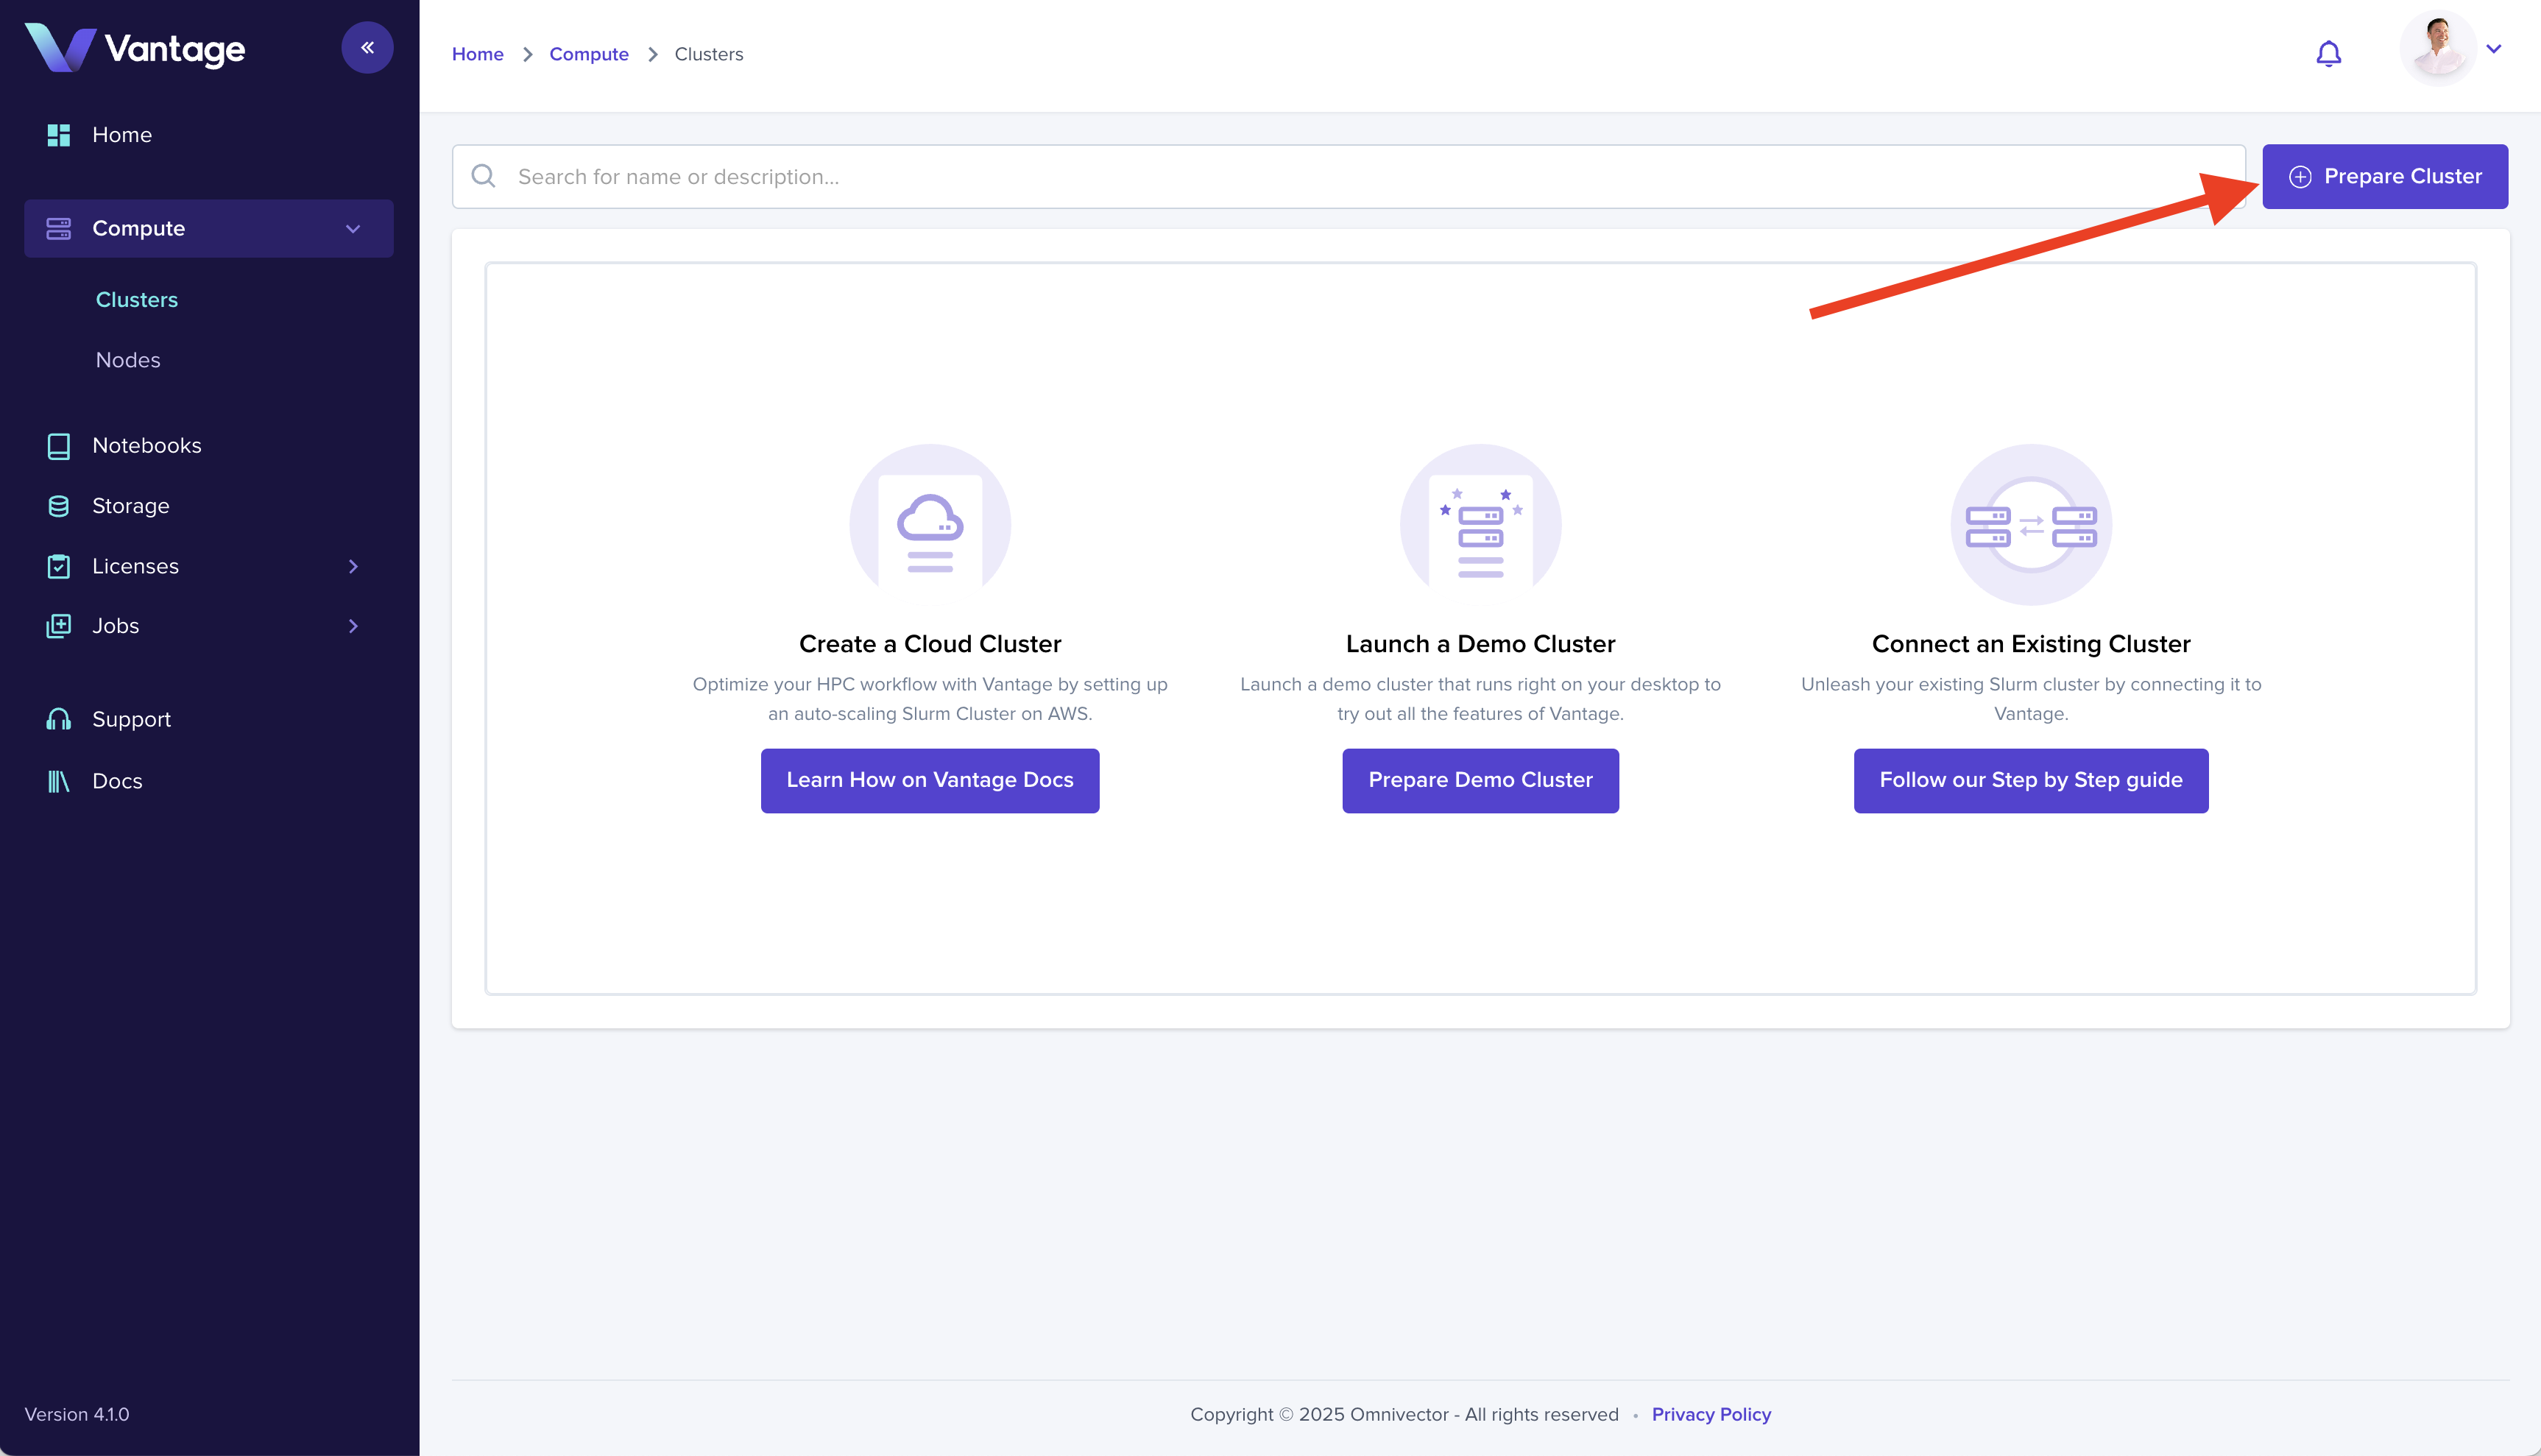
1. Access the Cluster Dashboard
Navigate to the "Clusters" dashboard to prepare your first compute resource.

2. Prepare a Cluster
Select the "Prepare Cluster" button in the upper right hand corner.
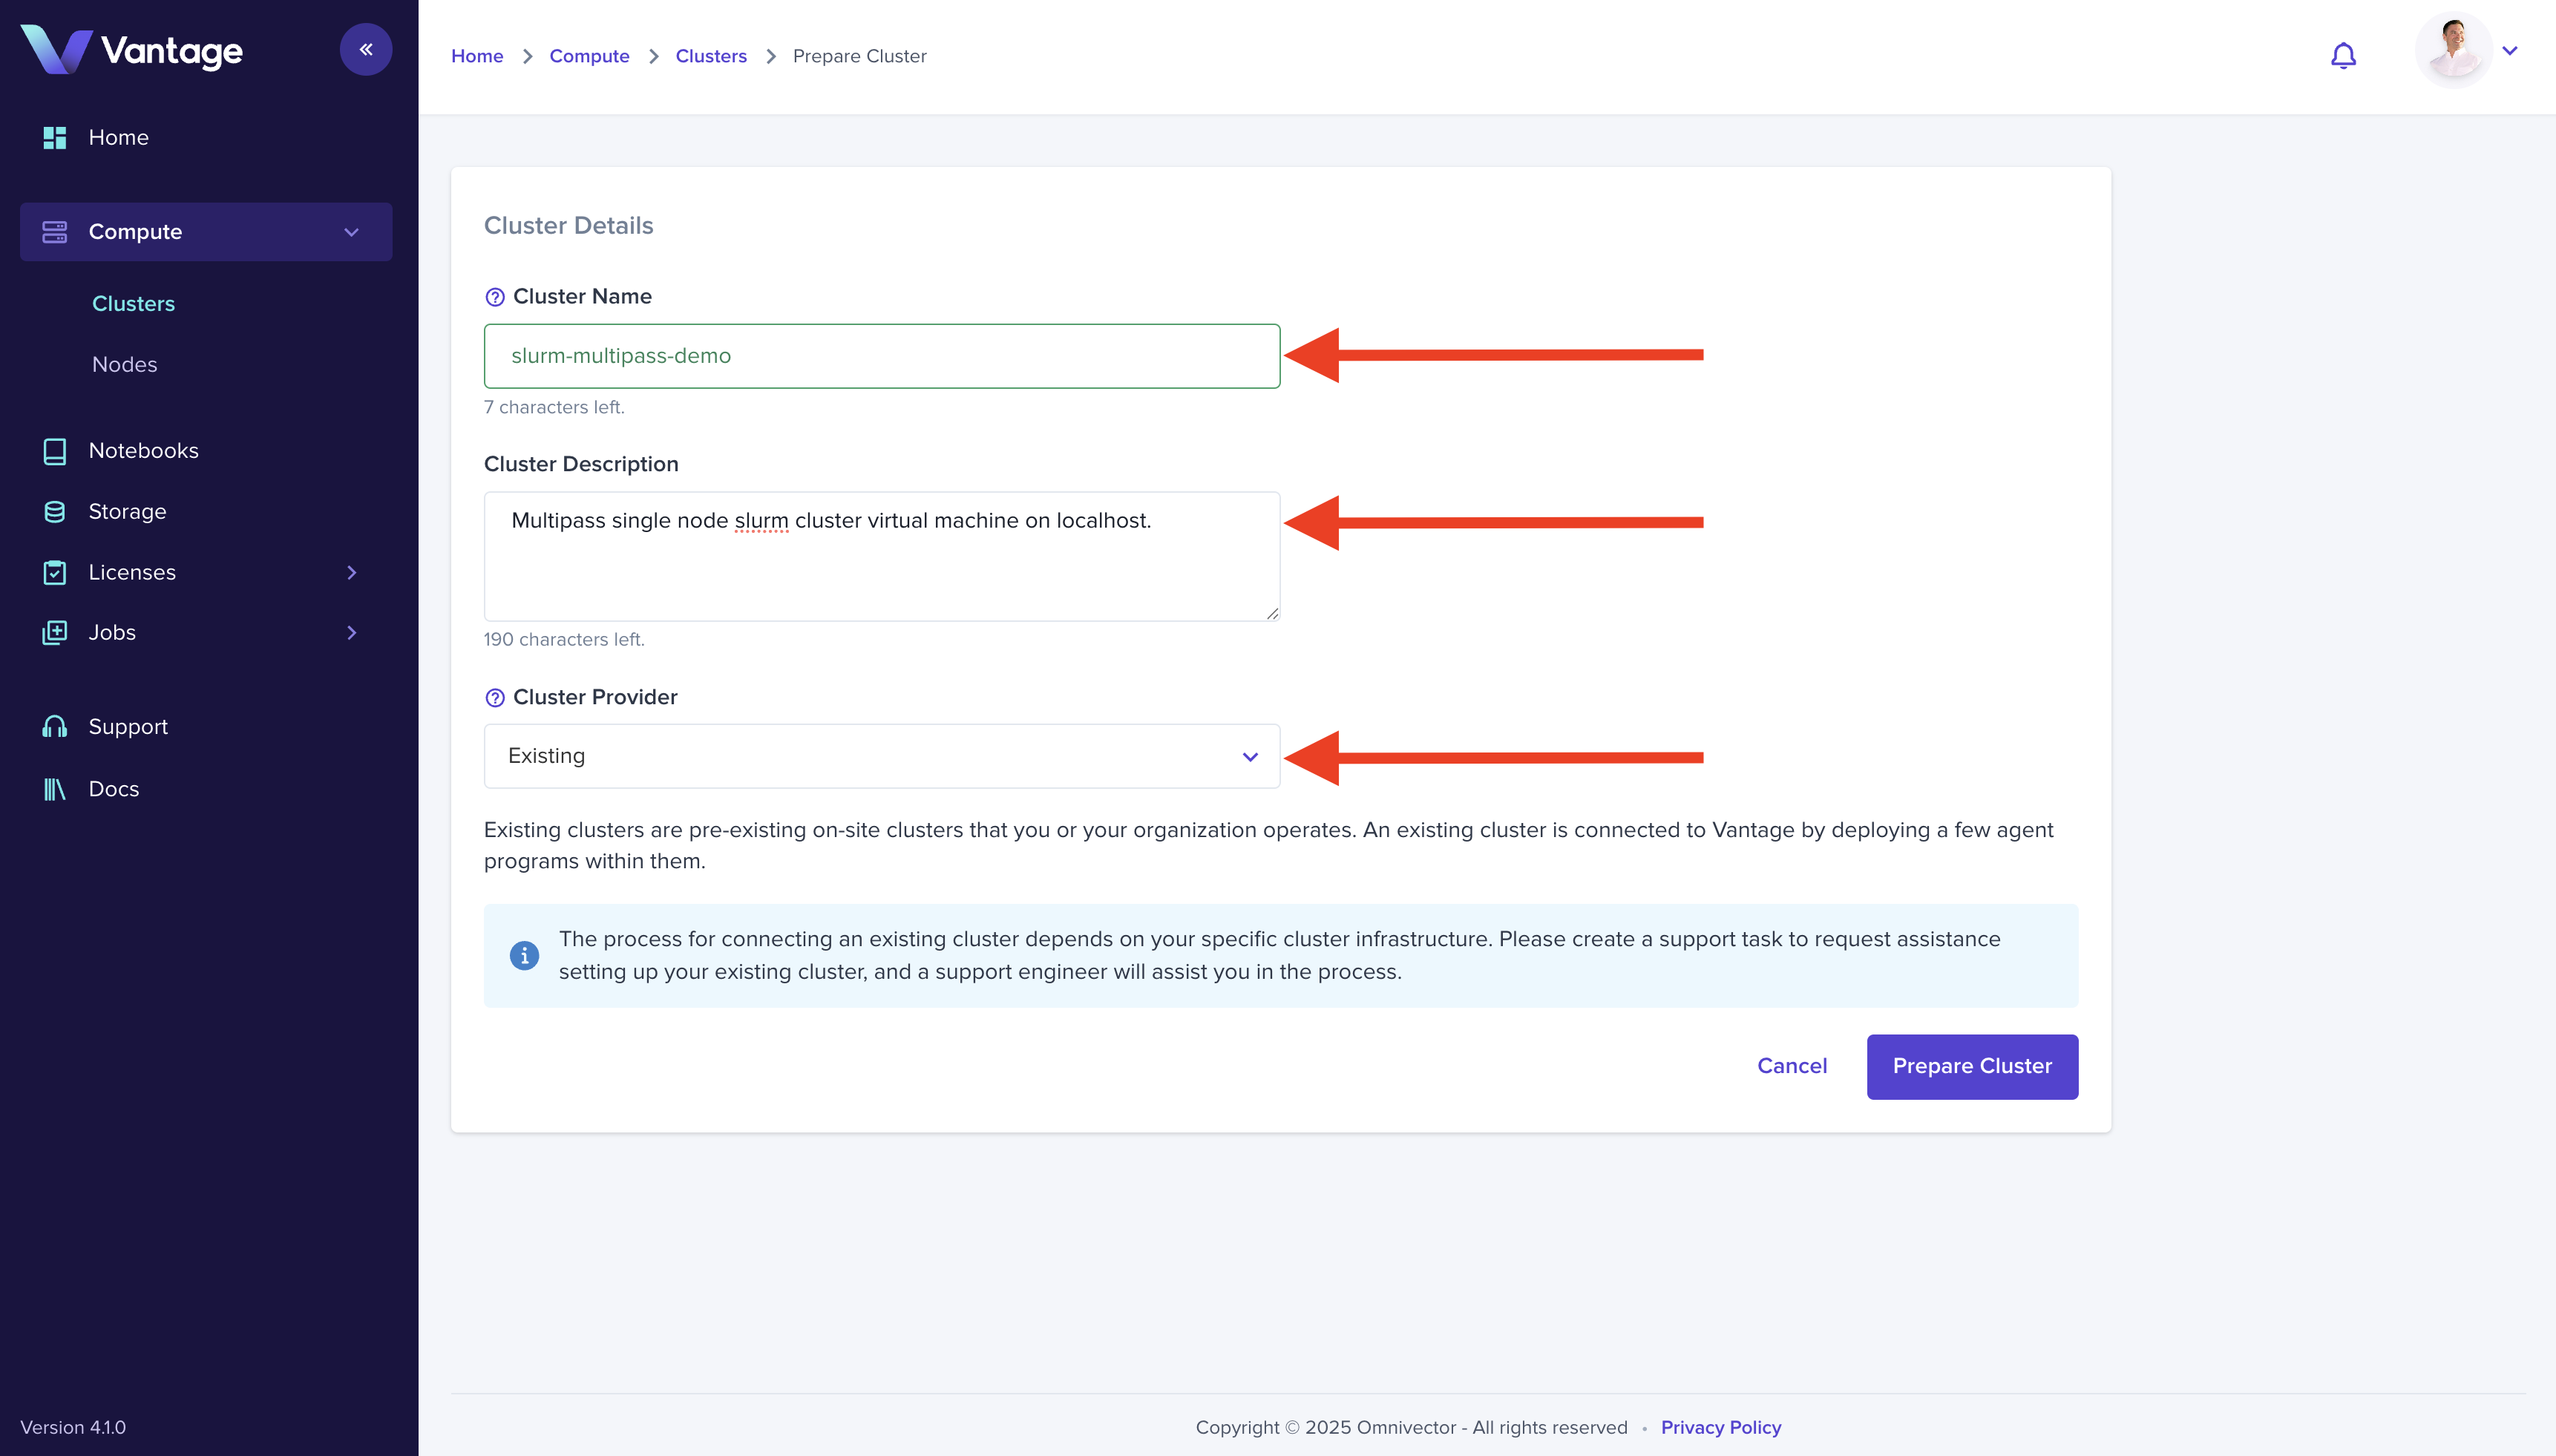
3. Existing == On-Premises == Localhost
Give your cluster a name and choose the "Existing" cluster type from the dropdown, then click "Prepare" to create a Cluster entry in the Vantage platform.
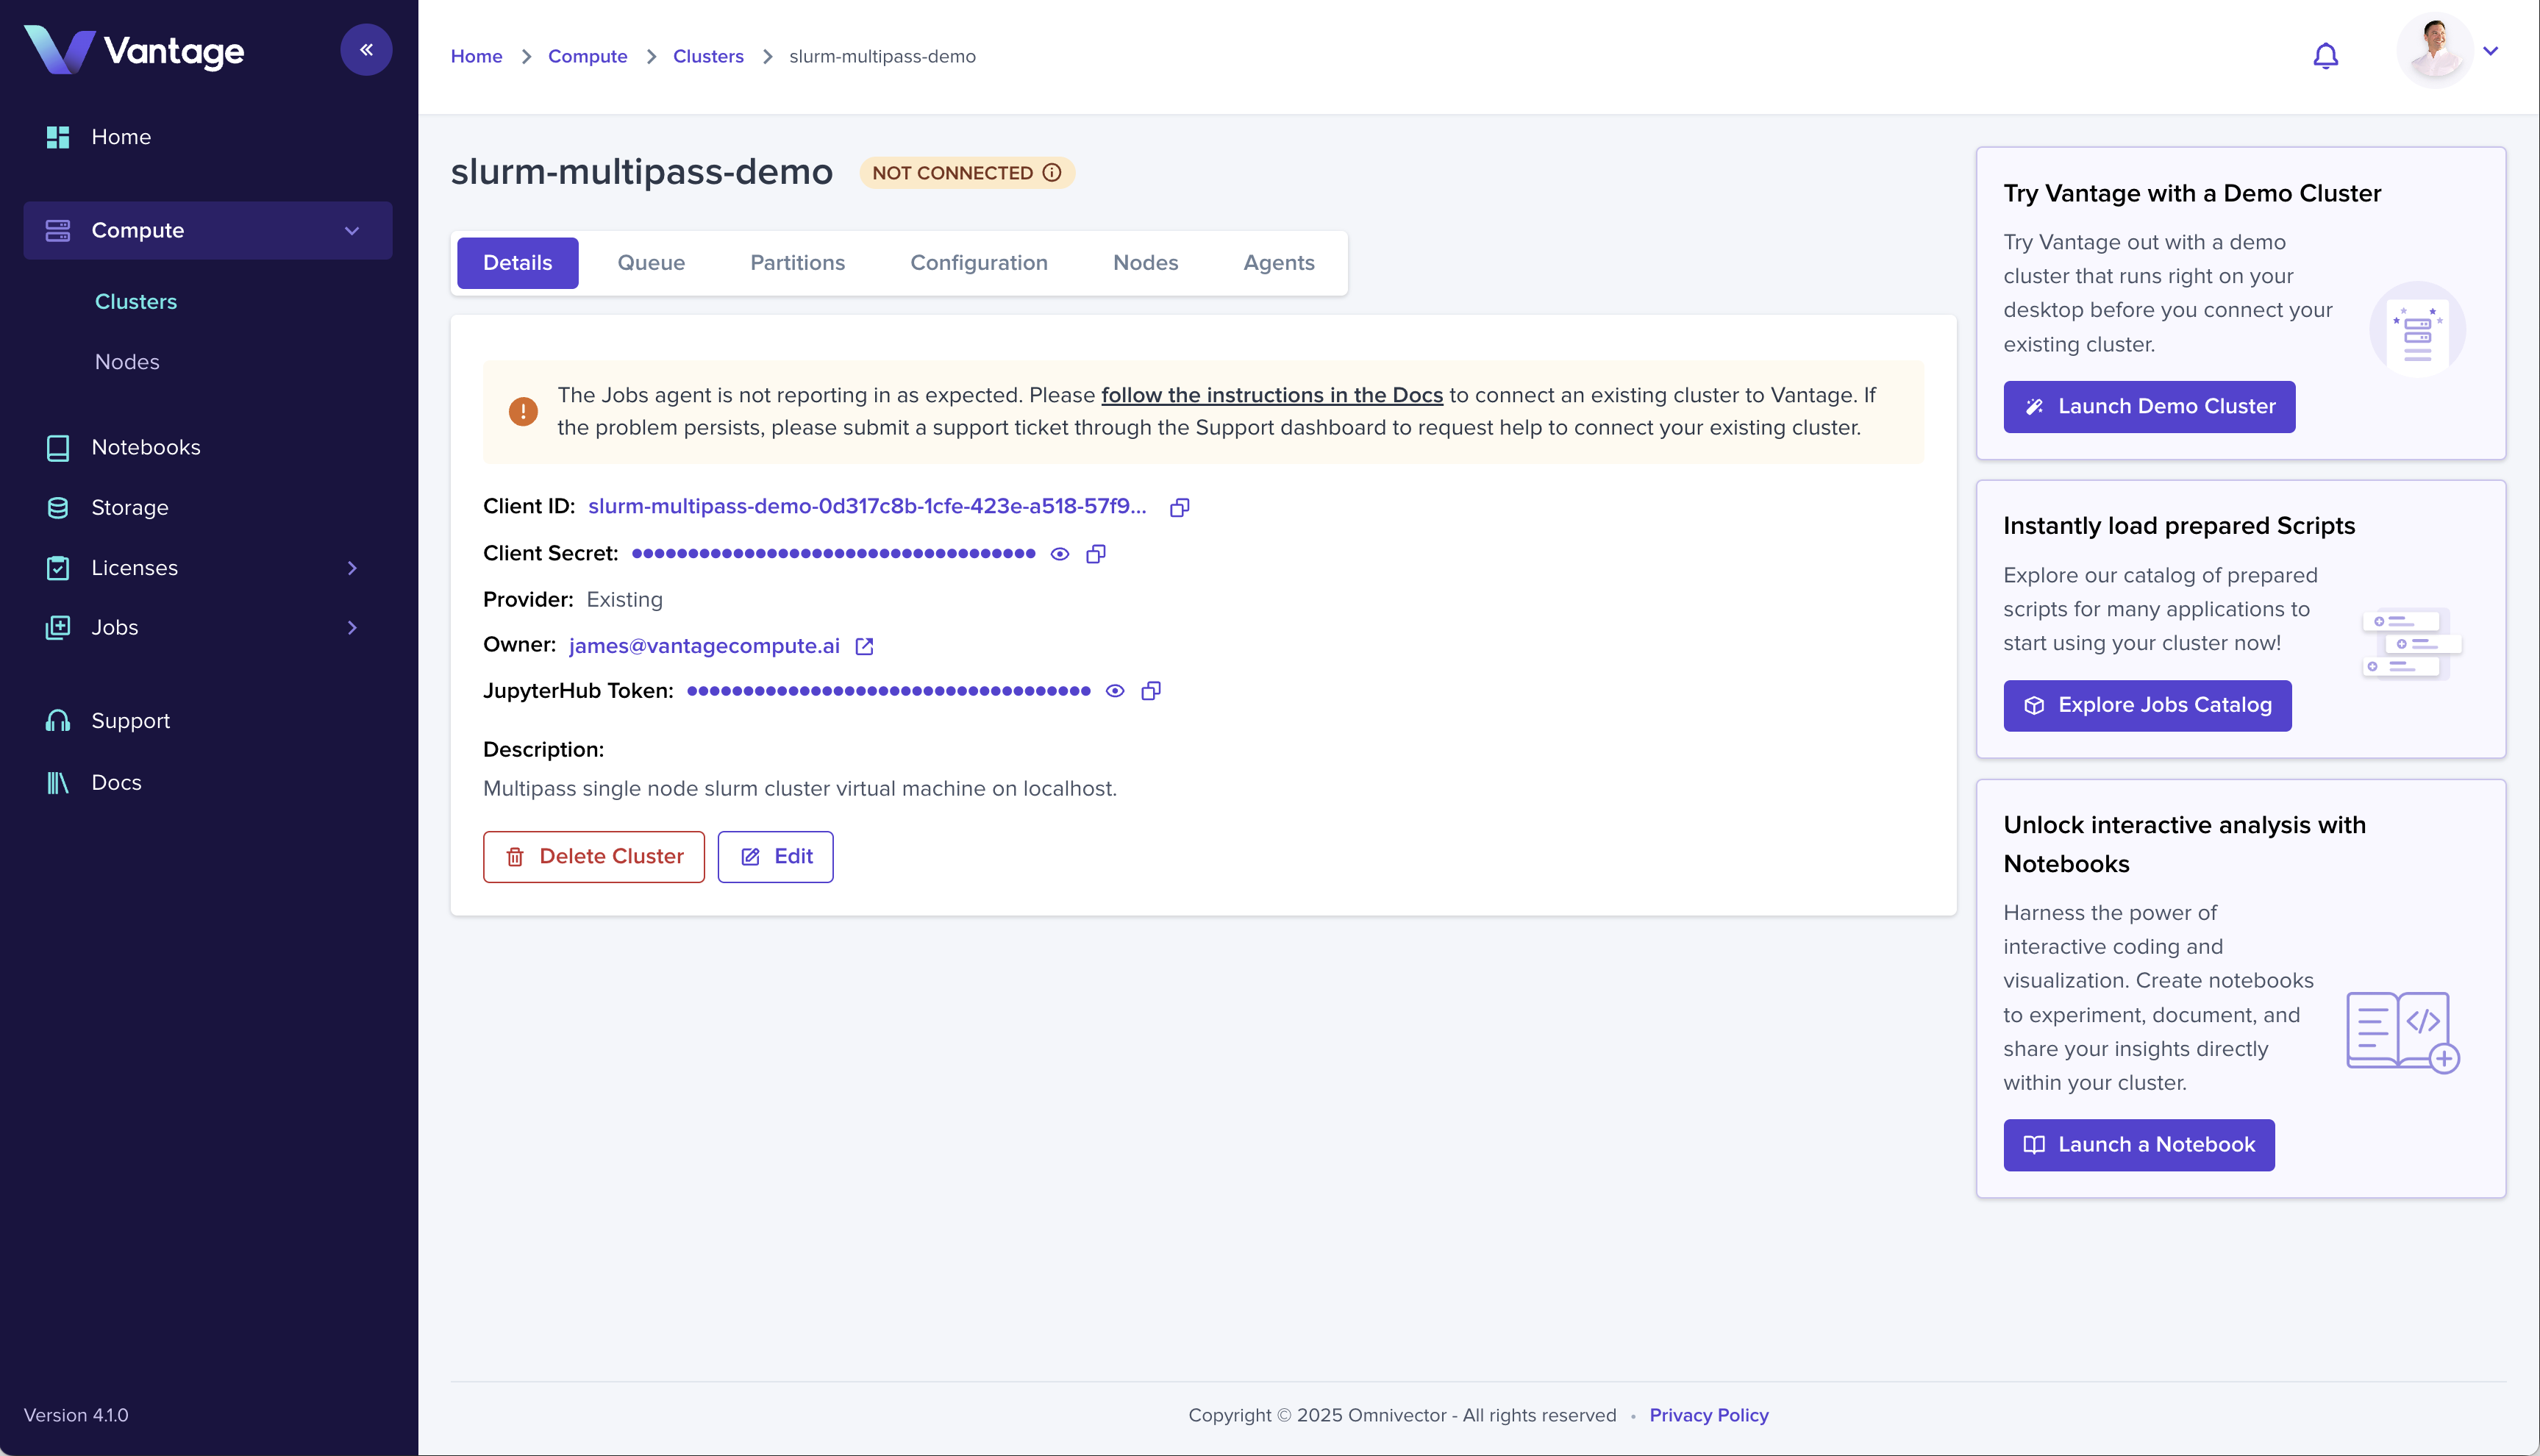
4. Cluster Created in Vantage
You now have an entry in the Vantage database that represents your cluster, but as you will notice in the cluster detail view, there isn't anything connected yet.
This is because "Existing" clusters are infrastructure that you provide and connect to the Vantage platform.
To deploy a minimal slurm cluster and connect it to Vantage, proceed to the next step.
5. Deploy a Slurm Cluster with Vantage CLI
Vantage exposes the concept of "Deployment Applications". "Deployment Applications" are curated automation that Vantge uses to provision HPC clusters and other peripheral application infrastructure.
In this tutorial you will create slurm cluster by means of a "Deployment Application" on the "localhost" cloud. The
"localhost" cloud supports multipass, lxd, and microk8s as infrastructre mediums.
Install the Vantage CLI and choose the appropriate "Deployment Application" for your desired "localhost" cloud.
Install Vantage CLI
Install UV
Install uv.
sudo snap install astral-uv --classic
Vantage CLI
Install the Vantage CLI.
uv venv && \
    source .venv/bin/activate && \
    uv pip install vantage-cli
Login with Vantage CLI
Run the vantage login command to authenticate with the Vantage platform and acquire a token.
This command returns a url that you need to enter into your browser to authenticate.
vantage login
Following successful authentication, you will be ready to create an actual HPC cluster and connect it to Vantage.
Install Dependencies and Create a Deployment Application
- Multipass
- LXD
- MicroK8S
Install Multipass
Install multipass.
sudo snap install multipass
Create the slurm-multipass-localhost Deployment Application
Now that the dependencies have been satisfied, create your slurm cluster using the
slurm-multipass-localhost deployment application.
The command format is:
vantage app deployment <deployment-application-name> create <vantage-cluster-name>
Using the cluster name (vantage-tutorial-cluster) from above, the command would be:
vantage app deployment slurm-multipass-localhost create vantage-tutorial-cluster
Install Juju and LXD
Install lxd.
sudo snap install lxd
sudo lxd init --auto
lxc network set lxdbr0 ipv6.nat false
Install juju.
sudo snap install juju --channel 3/stable
Bootstrap a Juju controller on LXD.
juju bootstrap lxd
Create the slurm-lxd-localhost Deployment Application
Now that the dependencies have been satisfied, create your slurm cluster using the
slurm-lxd-localhost deployment application.
The command format is:
vantage app deployment <deployment-application-name> create <vantage-cluster-name>
Using the cluster name (vantage-tutorial-cluster) from above, the command would be:
vantage app deployment slurm-lxd-localhost create vantage-tutorial-cluster
Install and Configure MicroK8S
Install microk8s.
sudo snap install microk8s --channel 1.29/stable --classic
Configure ACLS and ~/.kube Perms
sudo usermod -a -G microk8s $USER
sudo chown -f -R $USER ~/.kube
Initialize MicroK8S
Storage
sudo microk8s.enable hostpath-storage
DNS & Ingress
microk8s.enable dns
microk8s.enable metallb:10.64.140.43-10.64.140.49
Create the slurm-microk8s-localhost Deployment Application
Now that the dependencies have been satisfied, create your slurm cluster using the
slurm-microk8s-localhost deployment application.
The command format is:
vantage app deployment <deployment-application-name> create <vantage-cluster-name>
Using the cluster name (vantage-tutorial-cluster) from above, the command would be:
vantage app deployment slurm-microk8s-localhost create vantage-tutorial-cluster
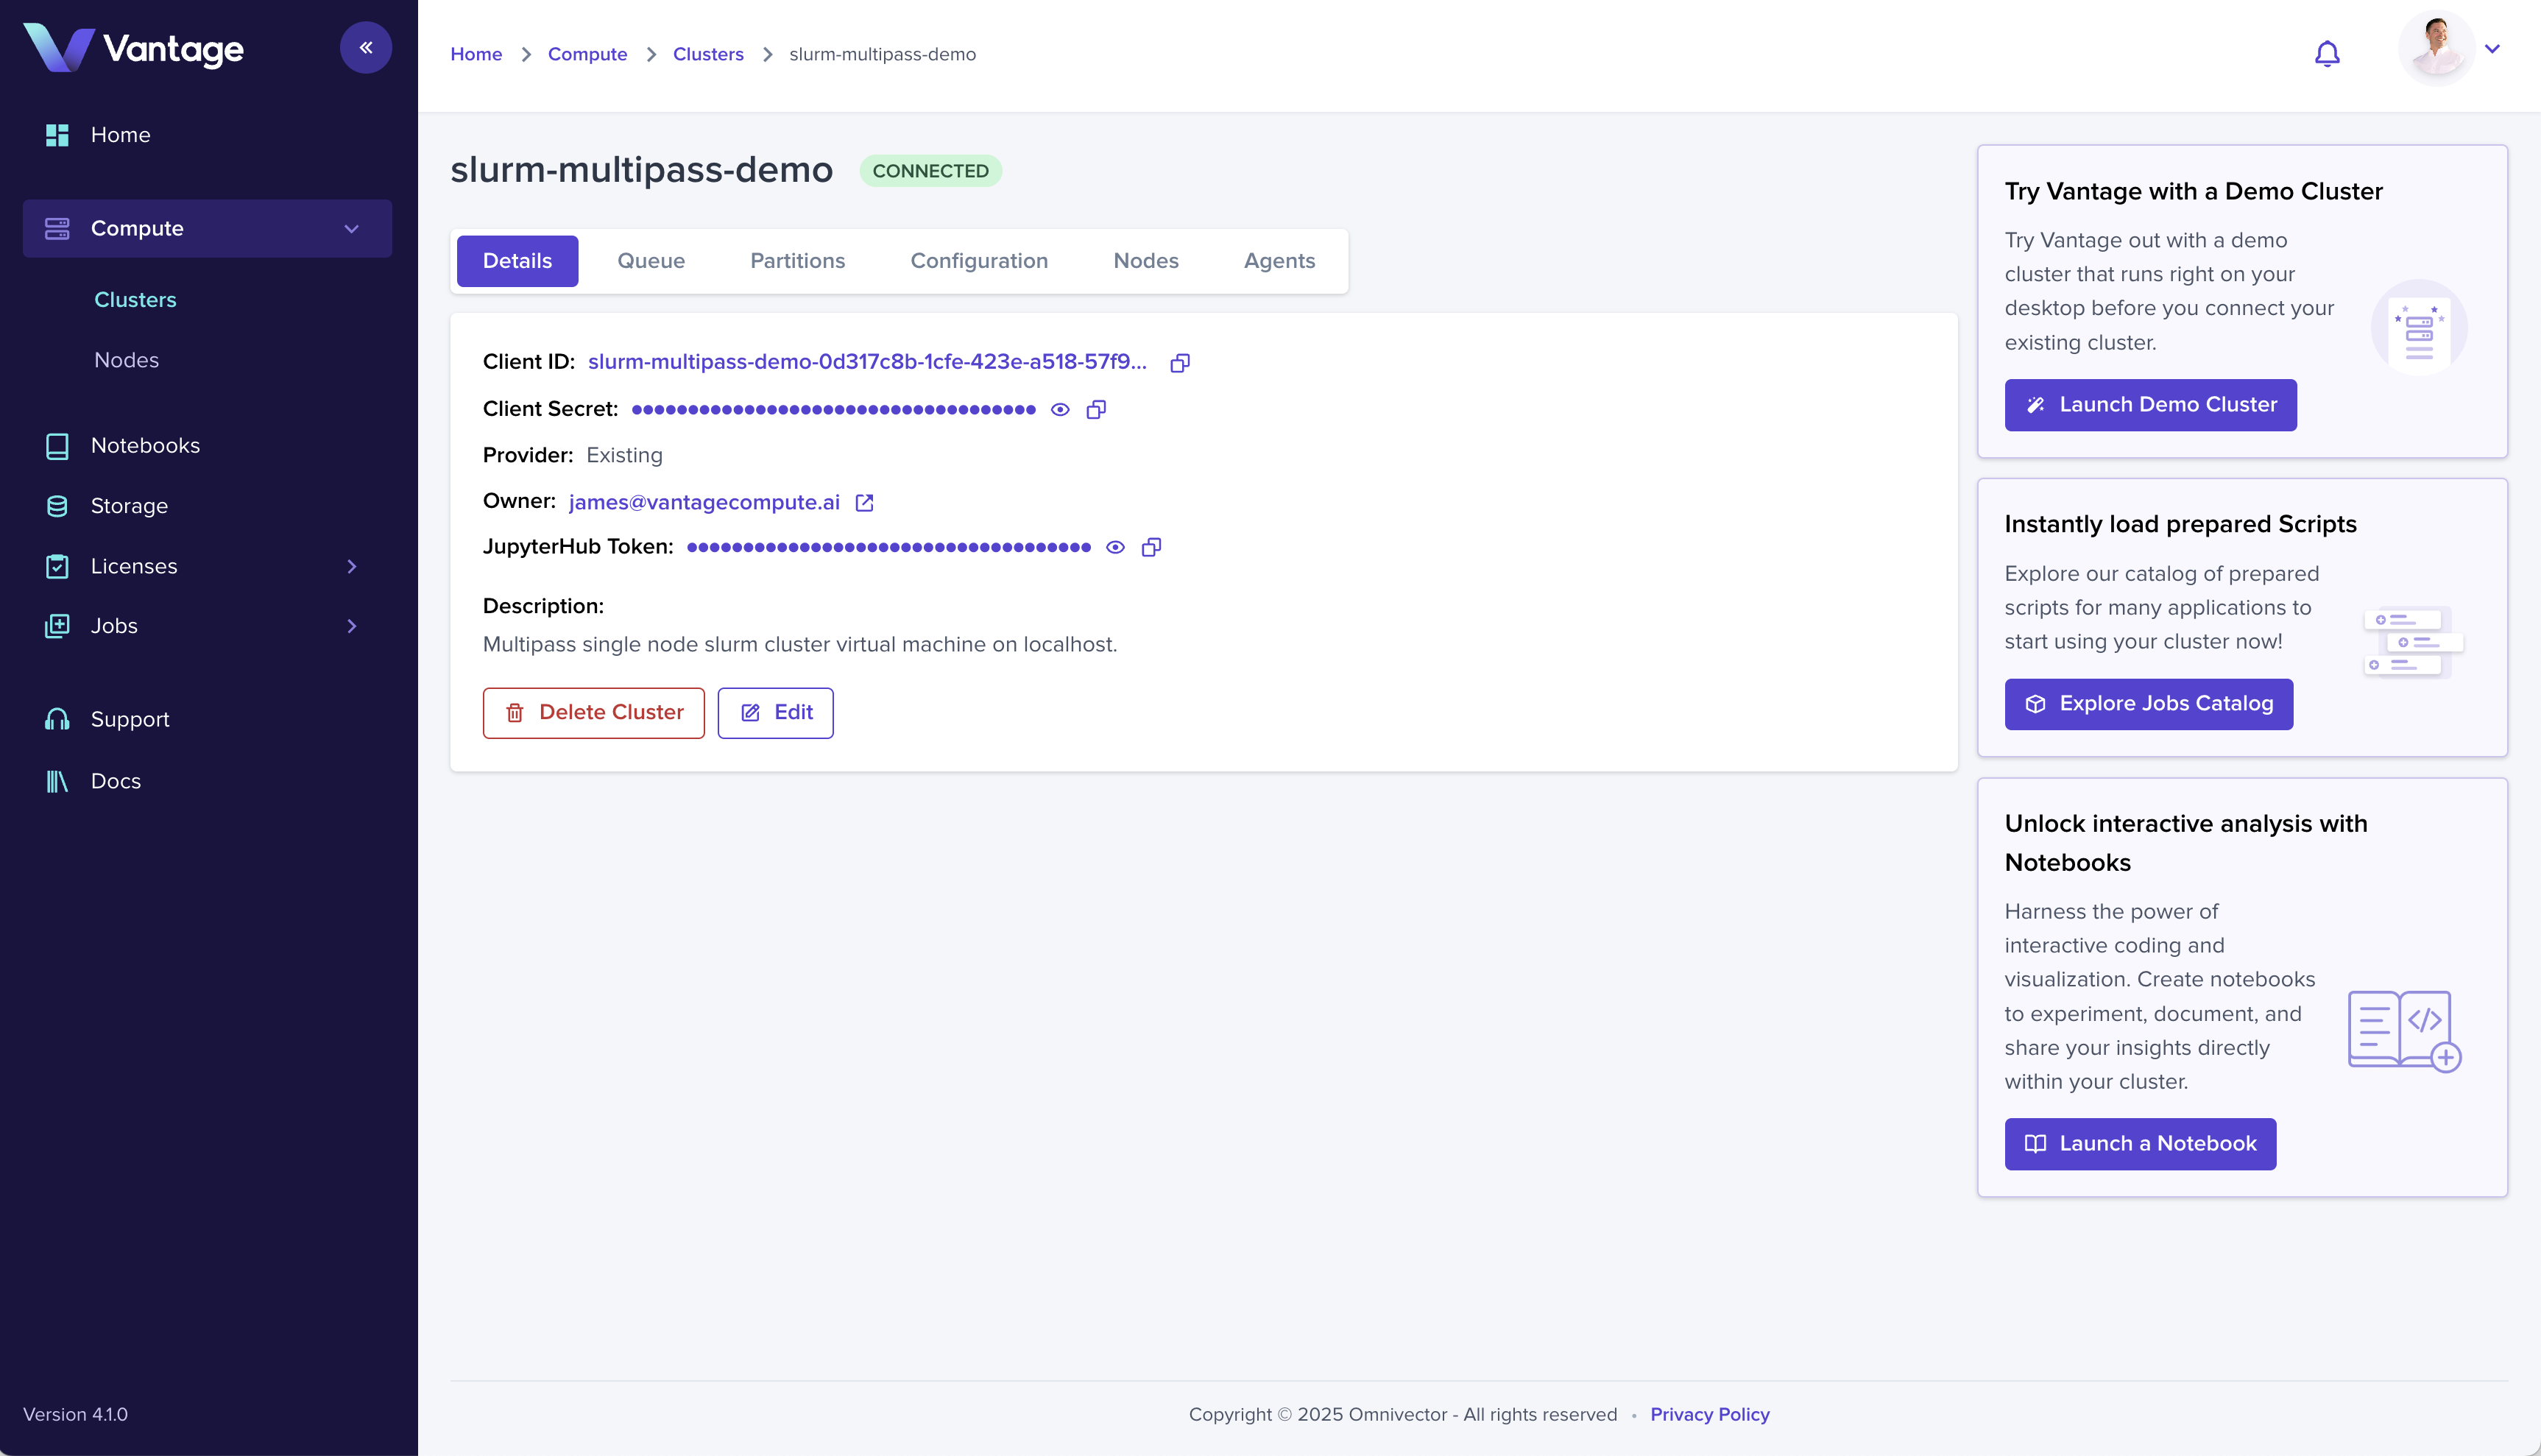
6. Cluster Connected, Let's go
Navigate back to the cluster detail view in the Vantage web ui and you will see the cluster status is now green and reads "Connected". You are now ready to begin using your cluster.