Create a Cluster
Overview
Clusters are the compute environments where jobs run in Vantage. This guide walks you through creating a cluster using the Vantage web UI. Two cluster types are supported: Slurm (traditional HPC) and Slurm on Kubernetes (Slurm deployed on an existing K8s cluster).
Clusters can also be created via the Vantage CLI, Vantage SDK, and Vantage API. For more information, see the respective documentation sections.
What You'll Learn
- How to navigate to the Clusters dashboard
- How to create a Slurm cluster or a Slurm on Kubernetes cluster
Prerequisites
- A Vantage account and organization (Sign Up)
- A configured Cloud Account — required before creating a cluster
Step 1: Access the Cluster Dashboard
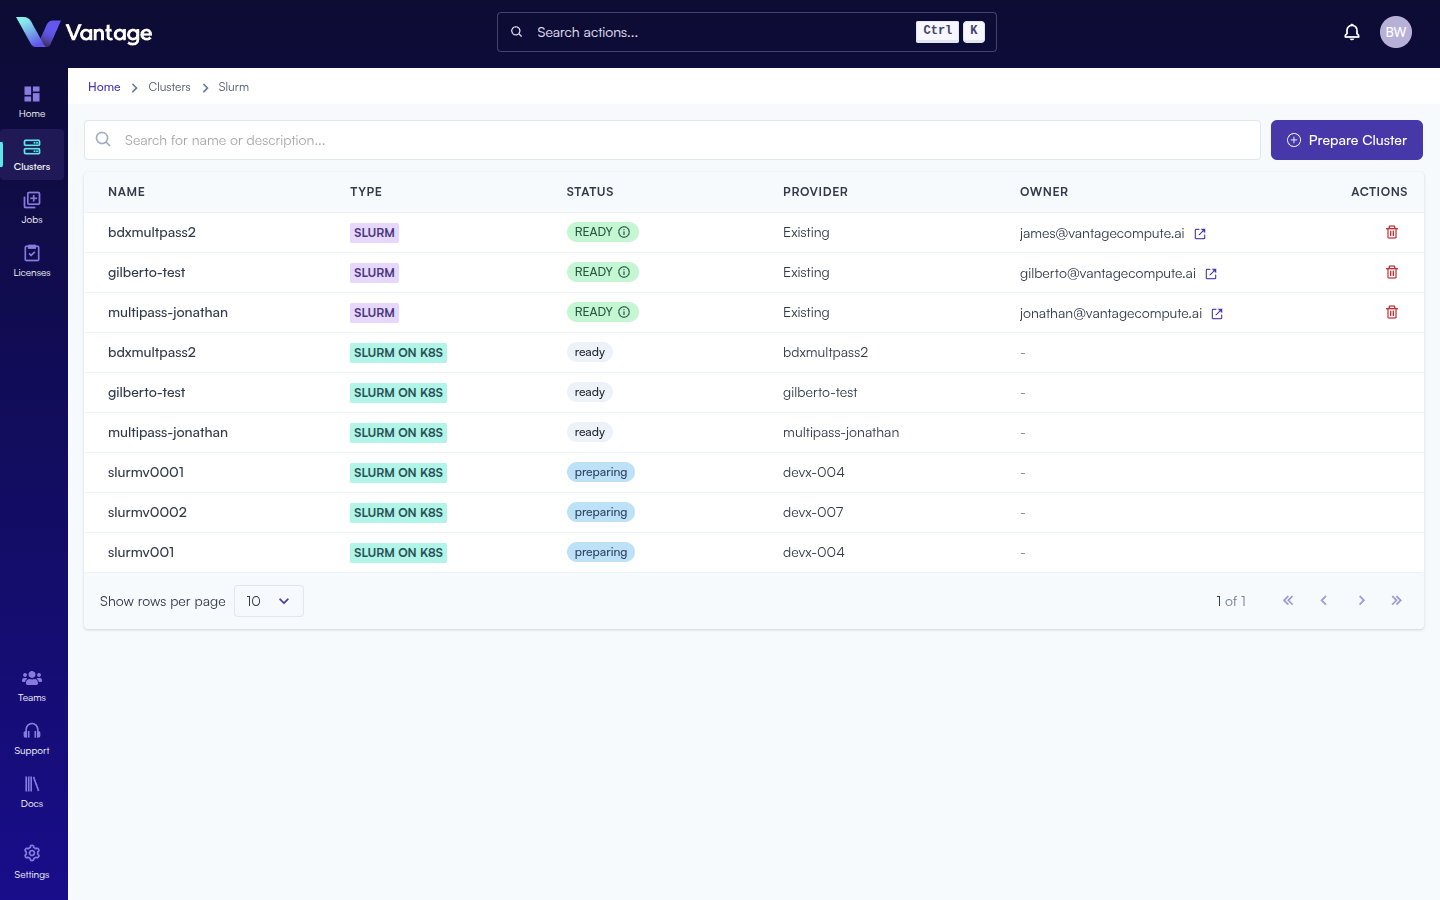
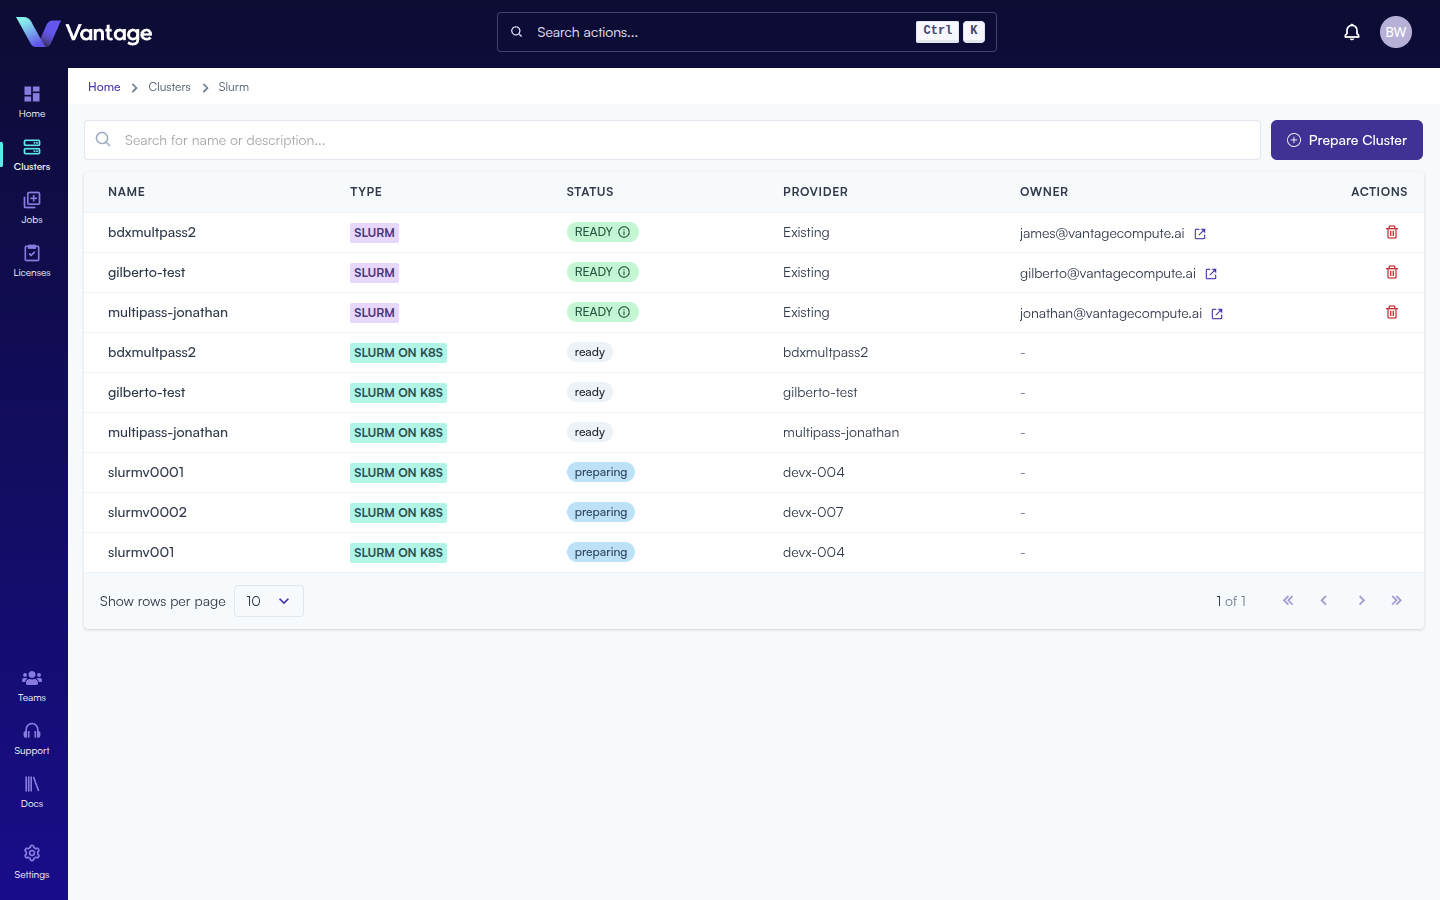
Click the Clusters icon in the left navigation sidebar. The Clusters list page shows all existing clusters with columns for Name, Type (SLURM or SLURM ON K8S), Status, Provider, Owner, and Actions.
Step 2: Prepare a Cluster
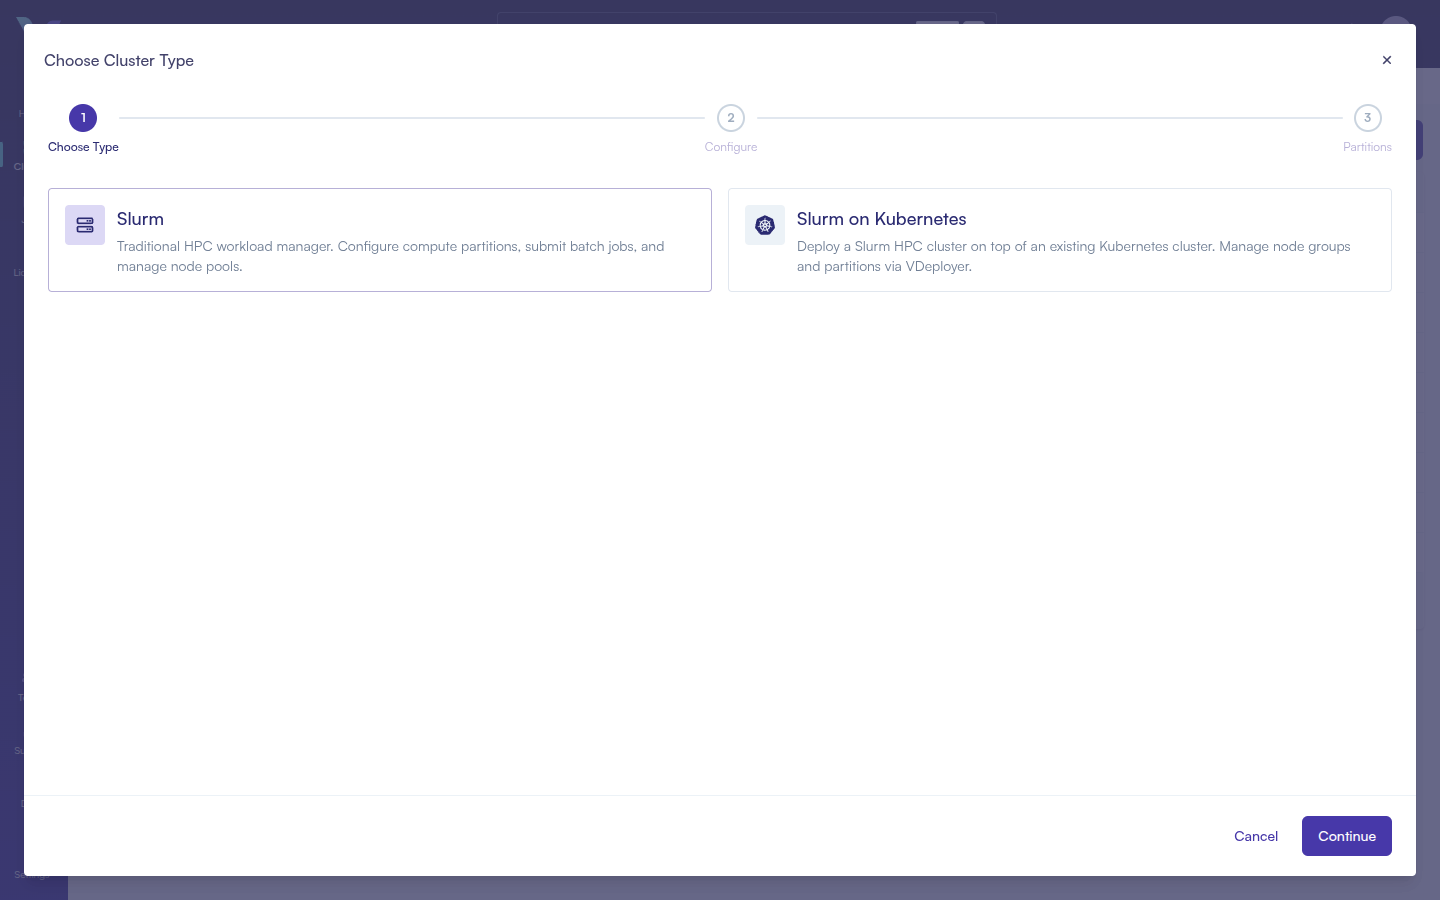
Click the + Prepare Cluster button in the top-right corner. A multi-step wizard opens titled "Choose Cluster Type".
Step 3: Choose a Cluster Type and Configure
Select the type of cluster you want to create:
- Slurm
- Slurm on Kubernetes
Traditional HPC workload manager. Configure compute partitions, submit batch jobs, and manage node pools.
Click the Slurm card and then click Continue.
Configure Cluster Details
| Field | Required | Notes |
|---|---|---|
| Cluster Name | No | Max 27 characters |
| Cluster Description | No | Max 255 characters |
| Cloud Account | Yes | Select from your configured cloud accounts |
The remaining steps depend on the Cloud Account type selected:
LXD or On-Premises accounts — No additional fields appear. Click Create Cluster to finish. The wizard completes in 2 steps.
Cloud provider accounts (e.g., AWS) — A notice appears: "Cloud clusters are deployed in AWS and scale automatically to the size of the workloads submitted to them." Additional fields appear:
| Field | Required | Notes |
|---|---|---|
| Region | Yes | Select your cloud region |
| Head Node Machine Type | Yes | Select a region first, then click Select Head Node to choose a machine type |
| SSH Key Name | Yes | Select a cloud account and region first |
Advanced Options (expand to configure custom networking — leave empty to use cloud defaults):
| Field | Required | Notes |
|---|---|---|
| VPC ID | No | Select a Cloud Account and region first |
| Head Node Subnet ID | Yes, if VPC selected | Select a VPC first |
| Compute Node Subnet ID | No | Select a VPC first |
Click Proceed to Select Partitions to continue. Configure your Slurm partitions, then click Create Cluster.
Deploy a Slurm HPC cluster on top of an existing Kubernetes cluster. Manage node groups and partitions via VDeployer.
Click the Slurm on Kubernetes card and then click Continue. This path has 4 steps: Choose Type → Select K8s Cluster → Configure → Creating.
Step 2 — Select K8s Cluster
A grid of available Kubernetes clusters is shown, with each cluster's name and cloud provider type. Click a cluster card to select it (it will show a highlighted border), then click Configure Slurm Cluster.
Step 3 — Configure
Cluster Name section:
| Field | Notes |
|---|---|
| Slurm Cluster Name | Enter a name for the Slurm cluster |
| Parent K8s Cluster | Pre-filled from the previous step (read-only) |
Node Groups section:
Two node group types are pre-configured — Control Plane and Compute Group:
| Field | Default | Options |
|---|---|---|
| Name | — | Enter a name for the node group |
| Profile | Medium (Control Plane) / Small (Compute) | Small (4 vCPU / 8 GiB), Medium (8 vCPU / 16 GiB), Large (16 vCPU / 32 GiB) |
| Max Nodes | 1 (Control Plane) / 10 (Compute) | Maximum number of nodes |
Click + Add Compute Group to add additional compute node groups.
Partitions section:
| Field | Default | Notes |
|---|---|---|
| Partition Name | "compute" | Name for the Slurm partition |
| Node Group | — | Select from the compute groups defined above |
| Default | Enabled | Whether this is the default partition |
Click + Add Partition to add additional partitions.
Click Create Slurm Cluster to begin provisioning.
Step 4: Verify Cluster Status
Return to the Clusters list page. The cluster status shows "preparing" while provisioning, then transitions to "ready" when complete.
Summary
Your cluster is now ready for workloads. You can launch notebooks, submit jobs, and manage compute resources through the Vantage platform.